
If you have a collection of photos you care about but you haven’t yet developed a sound backup system, then you’re playing with fire. Hard drives fail; cloud-storage systems are unexpectedly wiped; PCs get infected by viruses. You might think your photos are safe, but a stroke of bad luck can result in the loss of your entire image catalog.
Fortunately, image loss is almost completely avoidable. With an effective image backup system, you can ensure that your photos remain intact and impervious to fire, flood, computer crashes, viruses, and more. And I have more good news: Thanks to the advent of various electronic storage methods, effectively backing up your photos is both easy and (relatively) cheap.
Now, photo backup is a popular topic, especially among professional photographers and archivists. Nearly everyone who has implemented a robust backup system has a strong opinion about the best way to back up your images – but I want to emphasize, from the outset, that there are a number of excellent approaches to image backup, and at the end of the day, the method you choose should conform to your own needs.
I have my own preferred method of backing up my images, and in this article, I discuss my personal strategy. But I also explain the components that go into an effective backup system so you can create your own custom solution, and I offer specific recommendations for different types of users.
Ready to learn how to back up your image files so you can sleep more easily? Let’s get started!
The 3-2-1 Backup Method, Explained

A robust – and popular – approach to file backup is often referred to as the 3-2-1 method. It’s recommended by data-storage professionals and used in dozens of industries, including photography and archival storage. I use this approach myself, and I know plenty of other photographers who recommend it, as well.
The 3-2-1 method of photo backup is simple to understand (even if it can be difficult to implement). You should have, at all times:
- Three copies of your image collection, which should be stored using
- Two different types of media, and you should always maintain
- One off-site copy in case of disaster
So if you’re a photographer with a 1 TB collection of images, to follow the 3-2-1 backup strategy, you should make sure that your 1 TB collection exists as three separate copies, stored in two different ways (e.g., in the cloud and on local drives), and at least one copy of your collection is located outside of your home.
This is a great approach to image backup, and it works well for nearly everyone. I will mention, however, that some data-storage experts have started calling for even more robust backup strategies.
For instance, one enhanced backup strategy is known as the 4-3-2 system. This approach is similar to the 3-2-1 system, except that it kicks each requirement up a level: it requires four copies of your data, stored in three different locations, two of which are outside of your home.
The 4-3-2 strategy certainly adds an extra level of security. But it was developed in response to ransomware attacks, and it’s not especially geared toward photographers – so while you can use such an approach, I wouldn’t stress too much about it.
Image Backup Starts in the Camera

Most photographers think of image backup as beginning (and ending) with the computer. For enthusiast photographers, as well as professionals who don’t shoot directly for clients (e.g., landscape photographers), this computer-focused approach to photo backup can work well.
But if you’re a professional photographer who works with clients in a way that prevents easy, low-effort reshooting – in other words, if you do portrait sessions, weddings, commercial sessions, sports shooting, or photojournalistic photography – then it’s important to start your backup workflow not on your computer, but in your camera.
Specifically, I recommend using a camera model that offers dual card slots. Then set your camera so that with each press of the shutter button, you capture two files: a standard image file and a copy. That way, even if one of your memory cards fails, is damaged, or is accidentally wiped during the image-transfer process, you have a second card full of perfect copies to bail you out.
Unfortunately, not all cameras offer dual card slots. But nearly all models designed for fast-paced professional photoshoots do, and if you’re photographing for clients, it’s an investment that you should almost certainly make.
Again, I don’t think that such a stringent approach to image backup is necessary for most photographers, or even many professional photographers. Memory cards don’t generally fail, and in most scenarios, if a card does fail and you can’t recover the images, it won’t be the end of the world. But for those photographers shooting once-in-a-lifetime events for clients, it’s a necessary precaution.
(By the way, if you do studio photoshoots for clients and you don’t want to use the dual-card approach to backup that I mentioned above, another option is to tether your camera to your computer; that way, image files are instantly sent to your computer hard drive, resulting in a second-by-second backup of your photoshoot images.)
Understanding Your Image Backup Options
Earlier in this article, I explained the 3-2-1 backup method. It’s the blueprint for photo backup that I recommend you use, but while it’s highly effective, it’s relatively vague. After all, if you need three copies of each photo on two different media with one backup kept off-site, how should you do it? Should you use portable hard drives? Cloud-storage accounts? Network-attached storage? What works best for photography? What are your options?
Backing Up Your Photos With External Hard Drives

One of the simplest methods to create a backup of your images is to purchase a couple of portable external hard drives, plug them into your computer, and copy all the files from your memory cards to your external hard drives.
And when it comes to effective photo backup, I think this is an excellent starting point. Portable external hard drives are relatively inexpensive, they don’t take up much space, and they’re easy to operate. They also offer access to your photos at all times, provided that the drives are plugged into your computer.
Unfortunately, depending on the size of your image collection, the performance you require, and the frequency with which you’ll need to transfer new files, a basic external hard drive (i.e., a conventional USB-attached HDD) may be too limiting.
But for those who need better performance, there are plenty of reasonably high-capacity SSDs, which offer the same benefits as conventional HDDs combined with faster read and write speeds. With SSDs, you can quickly transfer photos from your memory cards following a photoshoot, and you can often use a photo editor to adjust your files straight from the external drives without any lag.
And if your issue is storage space – as in, your image catalog is too large to fit on a standard external hard drive, which tends to max out around 5 TB – there are higher-capacity external hard drives that operate based on the same principles as portable USB drives. These drives tend to be bulkier and heavier than portable hard drives, but as long as you don’t mind keeping them sitting on your desk, you should be fine.
Now, for hobbyist photographers, as well as those looking to maintain a more budget-friendly backup system, the types of drives described above are great. When I had a smaller image collection, I would purchase several portable USB drives, then regularly transfer over files from my memory cards to maintain copies of my photos.
But once your photo collection gets very large, you may start to struggle. You’ll end up with a lot of different hard drives, and you may wish that you had a backup system that was just more streamlined.
Backing Up Your Photos With Internal Hard Drives
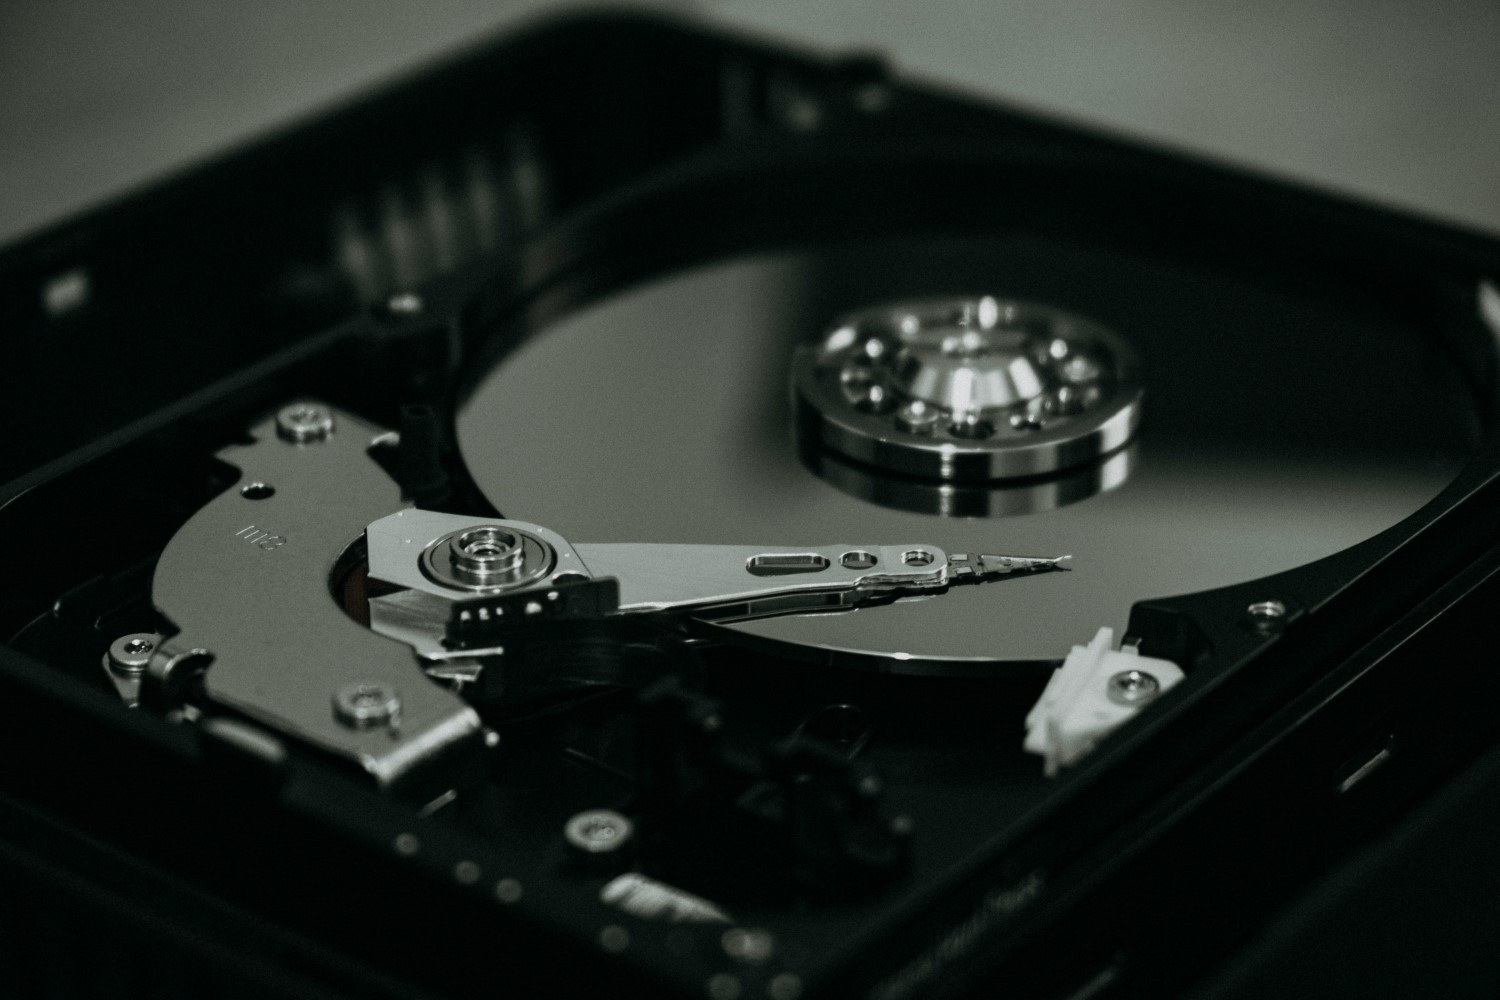
A few years back, I got tired of purchasing new external drives every year, and of trying to remember which images were on which drives, so I upgraded my system. I invested in a drive enclosure, which I filled with internal hard drives.
What is an internal drive? An internal drive, unlike an external drive, cannot be easily added and removed from a computer. There’s no simple USB connector; instead, an external drive must be installed into a drive enclosure, which will in turn be connected to your desktop PC via its own connector cable.
(Technically, if your computer has the relevant ports, you can connect one or more internal drives without an enclosure. But this involves opening up your PC and fiddling around with the hardware inside, which can be off-putting for a lot of folks.)
Anyway, once I hooked up my enclosure to my desktop computer and copied all my files to my new internal drives, I was able to access each and every drive without needing to fiddle around with USB cords.
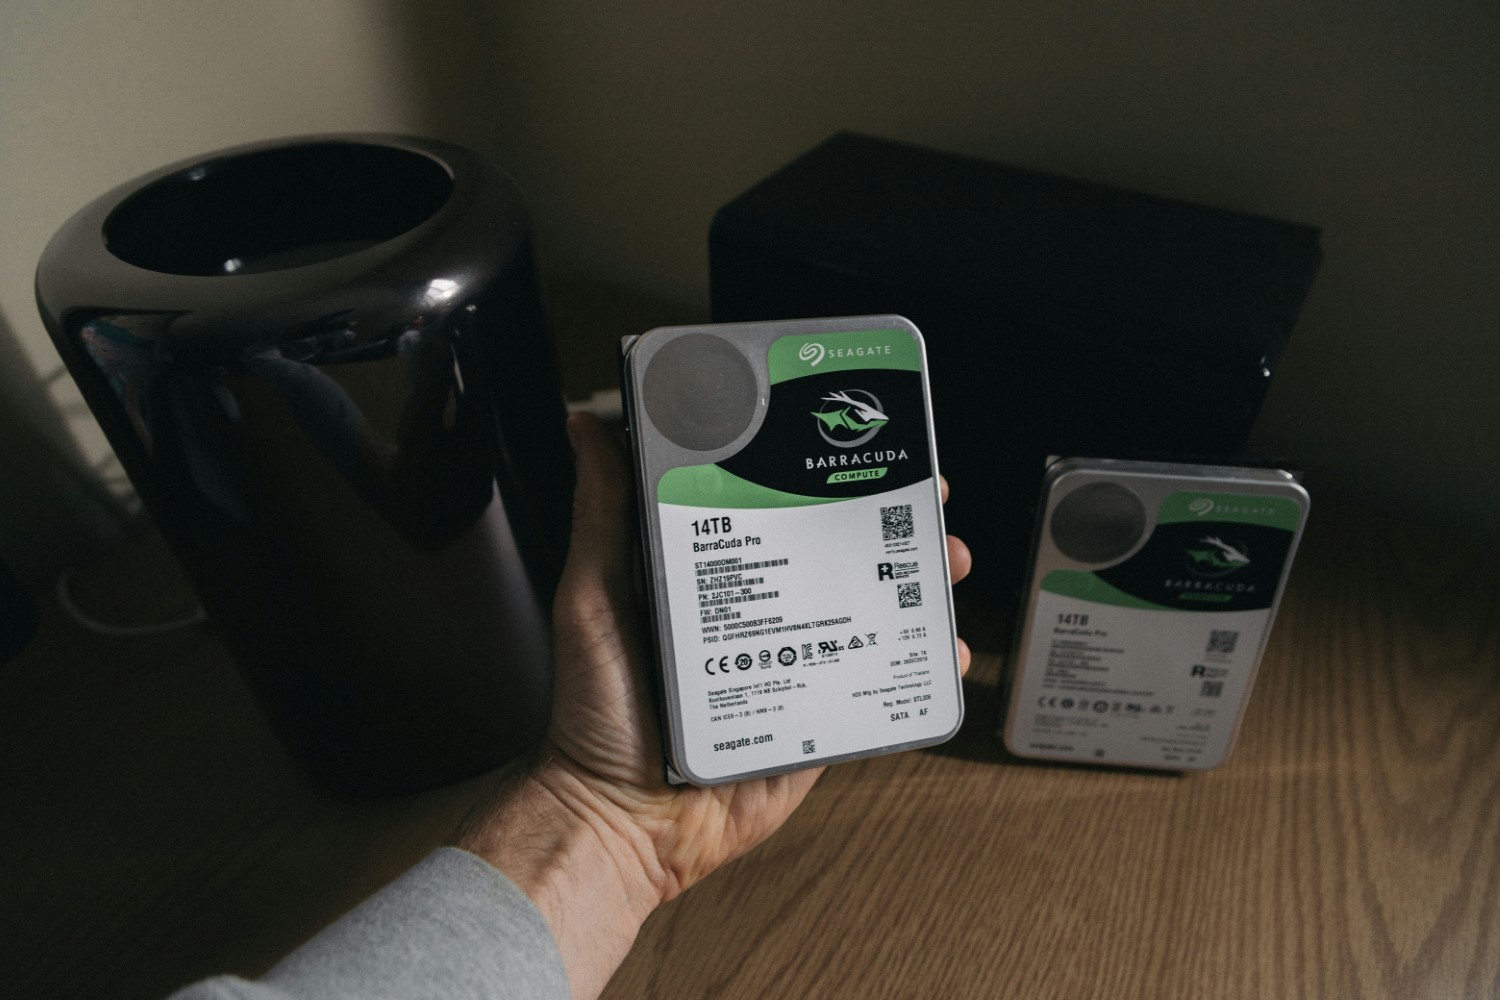
Not only did this approach help me organize my drive setup into one accessible location, but it also allowed me to purchase ultra-high-capacity drives that do a much better job of storing my growing image collection. (Internal drives tend to come in higher capacities compared to portable external drives, and I personally favor 16 TB and 18 TB models.)
An array of internal drives also comes with other benefits. The performance tends to be better, and the drives are often more robust, since they’re designed for more serious data storage solutions.
More importantly, however, when you put multiple drives into an enclosure, it becomes extremely easy to create image backups. You can designate certain drives as backups and manually ensure that some drives act as copies of one another; alternatively, you can set up your drives in a RAID 1 configuration, so that the drives are constantly and automatically mirroring one another. That way, you don’t have to spend time manually maintaining copies, and you can rest easy knowing that your images are safely backed up.
The biggest downside to an enclosure-based approach is price – both the drive enclosure and the drives can be on the expensive side – but the improved reliability and storage capacity, as well as the ease with which you can maintain backups, makes it a good pick for serious photographers and archivists.
I want to emphasize, however, that all of these drive-based backup solutions come with one substantial limitation: the contents can only be accessed from a physically connected computer (generally your desktop PC). If you need to access your collection of photos from multiple devices or while you’re traveling, you’ll be out of luck, and that’s where network-attached storage comes in.
Backing Up Your Photos With Network-Attached Storage
Network-attached storage (or NAS) starts with an array of drives organized in an enclosure, just like the internal-drive-based method of storage that I discussed above.
The difference is that a drive enclosure designed for network-attached storage allows you to access your photos from any device connected to the network. So if you wish to review or edit your images while away from your primary workstation, you can (as long as you have access to the internet, anyway!).
Network-attached storage is also highly reliable, and it offers the same backup options as an internal drive enclosure; for instance, you can manually create drive copies, or you can implement a RAID configuration for automatic backup and protection.
As you’d expect, NAS setups cost more than local-drive-based setups. Whether the increased accessibility of NAS is worth it depends on you, and while I don’t use network-attached storage, myself, I know plenty of photographers who love the protection and access that it provides.
If you’re a frequent traveler, or you like to review, edit, or share files from several different devices, I think that network-attached storage is quite possibly the right choice. Just bear in mind that you’ll need to purchase both the main NAS device (i.e., the enclosure) as well as the NAS-equipped drives.
Cloud-Based Image Backup

Another popular method for backing up photos involves the cloud; in essence, you upload copies of your files to a third-party server (i.e., your cloud-storage provider) over a network connection. The cloud-storage provider then maintains your files on its servers, generally for a monthly or yearly subscription fee.
There are a staggering number of cloud-storage providers offering plans designed with varying degrees of sophistication and for a variety of purposes. However, what all these plans have in common is off-site storage. In other words, when you create a backup in the cloud, the files don’t reside on your local computer, but on servers elsewhere in the world.
When it comes to backing up photos, this is a big deal. As you’ll recall from the discussion of the 3-2-1 approach to backup above, maintaining an off-site copy of your photos is an essential part of any backup solution, as it keeps your photos protected against disaster and theft.
Cloud-based backups also offer remote access to your image files, similar to network-attached storage. However, the ease with which you can retrieve files can vary substantially. Some cloud-storage providers are geared toward long-term data backup and storage, and don’t allow for rapid retrieval of files; Backblaze, for instance, uses a slow, manual-download approach to file retrieval, so while it’s great for long-term backups, it’s not ideal for anyone hoping to regularly retrieve photos from the cloud for reviewing, editing, and sharing.
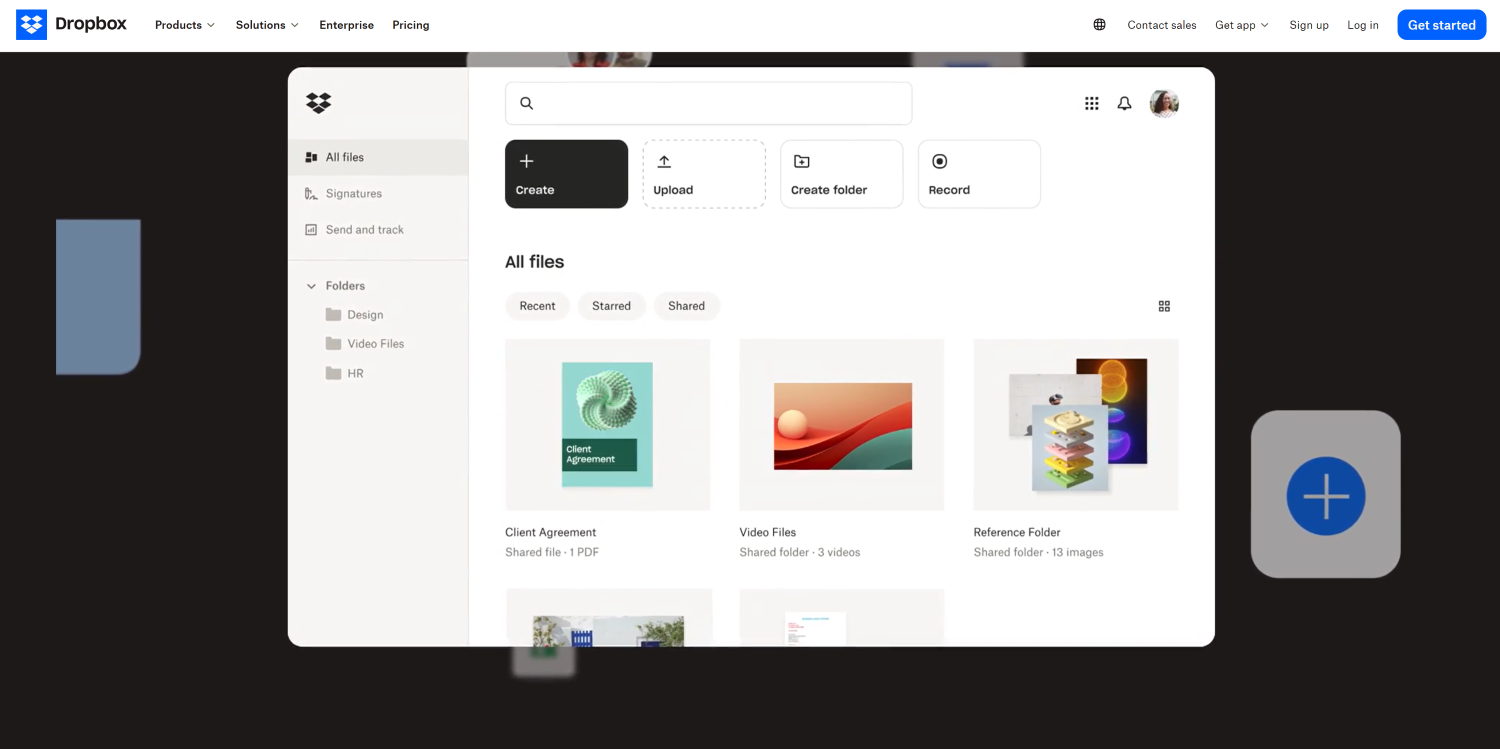
On the other hand, cloud-storage providers such as Dropbox are designed for rapid retrieval. With your photos backed up to a Dropbox folder on your laptop, they’ll be stored safely in the cloud, but you’ll have no trouble also accessing them via a wi-fi connection for sharing, editing, and reviewing.
In my experience, cloud-based backup solutions fall along an axis. On one end, you have accessible, high-performance storage (like Dropbox), and on the other end, you have high-capacity storage (like Backblaze). Cloud storage that offers lots of space and allows you to rapidly access image files does exist, but it’s extremely expensive.
Therefore, if you have a fairly small collection of images (i.e., it isn’t more than a few terabytes), and you want to create a copy of your photos that you can rapidly access from any location, a service such as Dropbox can be a good investment.

However, if your image collection is large, I’d really recommend using cloud storage for long-term backup. My favorite cloud-storage provider, Backblaze, is great for this; you simply tell it which drives you want to back up, and it automatically maintains copies in the cloud.
My Recommended Photo Backup Solution
So far, I’ve discussed two distinct methods for backing up your photos: creating image copies on drives (whether external drives, internal drives, or NAS drives) and saving image copies to the cloud.
But it’ll probably come as no surprise to learn that I don’t advocate using either of these approaches in isolation. Instead, for the safest, most robust backup solution, I encourage you to use both drives and cloud storage simultaneously.
Specifically, I recommend keeping two copies of your image collection on drives, and keeping a third copy of your image collection in the cloud. This follows the 3-2-1 backup strategy, and it’s the method that I myself use. Your two drive copies ensure that, even if one drive fails, you still have access to your photos. And your cloud copy ensures that, if your drives are stolen or your office space is flooded, you have an emergency backup that you can retrieve if needed.
Now, the details of your setup will depend on your image collection and preferred workflow, so here are two more specific recommendations:
First, if you have a small collection of images (less than 500 GB or so), I’d recommend keeping one copy of your photo collection on your desktop hard drive and manually maintaining a second copy on an external hard drive. You can then save a third copy of your photos to the cloud (a service such as Backblaze could work, or – if you wish to access your images away from your desktop computer – you could subscribe to Google Photos or Dropbox).
Second, if you have a larger collection of images or you expect the number of images you need to back up will increase at a rapid pace, I’d recommend investing in a drive enclosure and at least two internal drives. The drives should mirror one another, and you should ensure these two drives are synchronized at all times, whether you use a RAID configuration or copy the files manually.
If you don’t need remote access to your images, any large internal drives should do the trick, but if you do wish for high-performance remote access, make sure that the enclosure and the drives offer NAS capabilities. Regardless, invest in a long-term cloud-storage service as your off-site backup, and make sure that it regularly syncs with your entire collection of photos.
(If you have a large photo collection and require remote access, another option is to store your images on local hard drives, and then upload your best or most important files to a high-performance cloud-storage service; that way, you can access essential images when you’re on the go, but you don’t have to deal with exorbitant cloud-storage fees that come from many terabytes of data. Whether you then also back up your entire collection using a cloud-storage provider such as Backblaze is up to you.)
One final recommendation: No matter how you choose to back up your images, you should have one primary copy that’s easy to access and well-organized. Here, a photo-management program such as Excire Foto 2024 will be a huge help. Excire Foto 2024 is compatible with a wide variety of backup methods, including internal and external hard drives, network-attached storage, and even some cloud-storage services. And the software offers AI-powered tools for easily locating, keywording, categorizing, and culling your photos. That way, you can organize a messy photo catalog with minimal time commitment – and no matter where your files are stored, you’ll be able to find them in seconds.
Final Thoughts
Creating a robust system for backing up your photos might not be as exciting as spending time in the field with your camera. But it should be a fundamental part of every photographer’s workflow (and it’s also essential for anyone who has a collection of precious images).
If you’ve made it this far, you likely have a sense of the backup system that will work best for you. Just remember that your backup strategy will only work if you maintain it. To keep your photos safe, you must start transferring photos from your memory cards as soon as you come home from a photoshoot. And you must also be diligent about synchronizing your backup copies so that all of your photos are protected by the 3-2-1 system at all times.
Good luck, and go create those backups!